Synchro maker Volvo was introduced in Tango software update 1.95. The main function of this maker is to allow, the users of Tango Key Programmer that purchased it,to synchronize ECU and CEM modules found in Volvo vehicles.
In order to use the software you will need to load a dump file from both ECU and CEM modules in Tango software. In case that one of the modules is broken or the chip contents are replaced a file from a replacement (donor) module can be used.
Currently supported types of ECU and CEM contain the following chips:
CEM: 93C86, 28F400
ECU: 93C56,24C04, 95P08
Any combination of the above mentioned can be synchronized.
The main purpose of this document is to show and explain how to properly use this software.
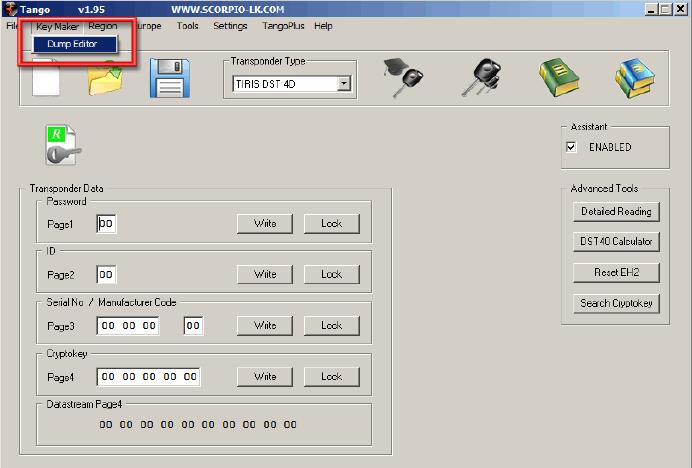
First Start Tango software and select Dump Editor mode:
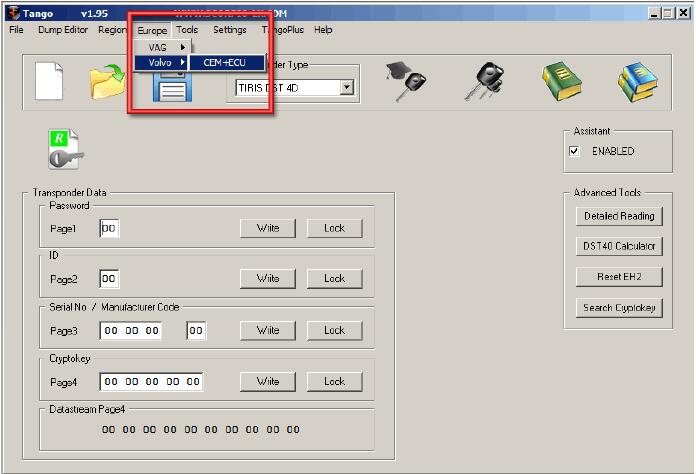
After that select Europe -> Volvo- > CEM+ECU
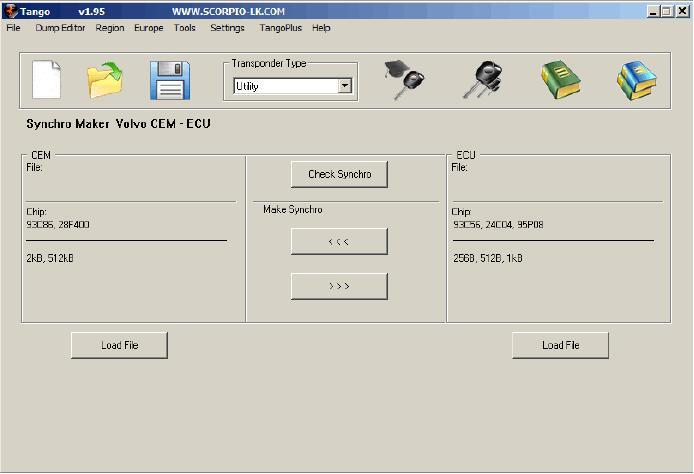
When loaded the software window looks like this:
The Synchronization of the modules begins with loading their dump files in Tango software, in the example used in this document the sync between CEM with 28F400 and ECU with 95P08 will be displayed. It doesn’t matter which file is loaded first
In this guide it will be demonstrated how synchronize the CEM module with the ECU.As a result of the whole procedure a new file for the CEM module will be generated by Tango and this file is synchronized and compatible with the originally loaded ECU file. The reverse operation – creating a new ECU file compatible with the original CEM file can be used instead, the procedure is basically the same.
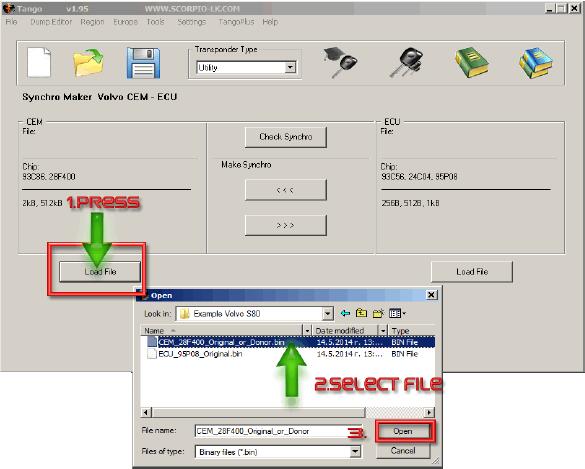
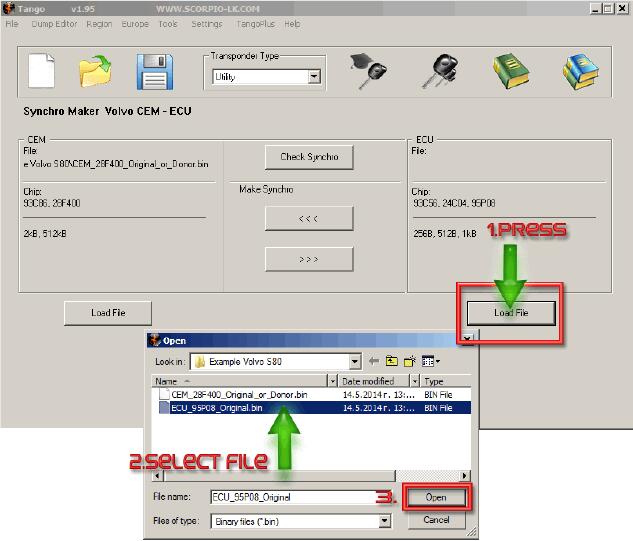
Synchronization is started with loading the dump file from the CEM module:
Using similar procedure load next the ECU file:
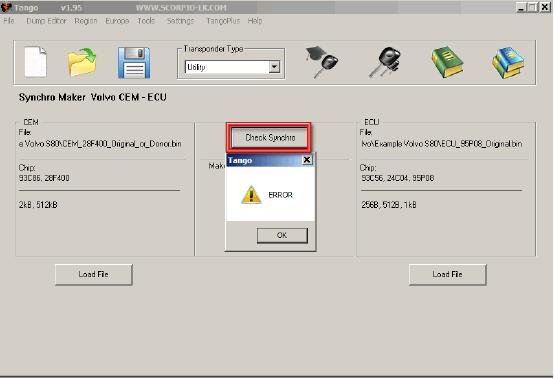
If you press the Check Synchro button now, it will display the following error, because at this point the files of the ECU and CEM are not synchronized. NB: If the files are taken from a working car the error will not appear and will write “SUCCESS” instead.
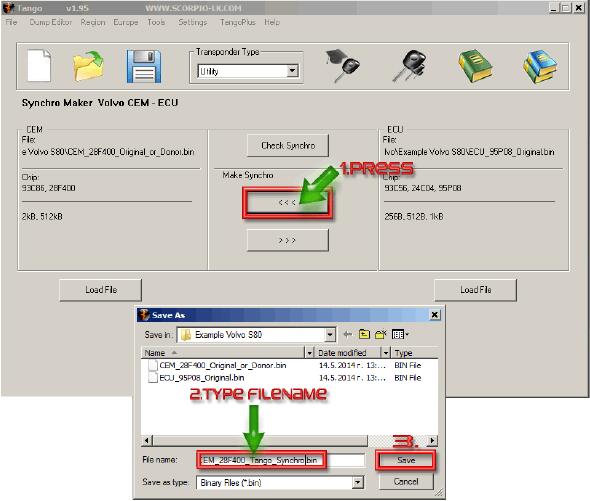
To actually synchronize the files press the arrows beneath “Make Synchro”. The upper arrow that points left will prompt saving a new CEM dump file that is synchronized with the ECU. The second button which points right may be used to create a new ECU dump file instead. Choosing which function to use (create new CEM file or create new ECU file) is up to users’ personal preferences and basically there is no difference. It may be a good idea to base your decision, which module to synchronize, on the unit where it is easier for you to reprogram. As to our example, rewriting FLASH 28F400 is more difficult than 95P08. Therefore it may be a good choice to generate file for the ECU module and write it back. Click the bottom button “Make Synchro” and save the new ECU file. In any case the newly generated file has to be written back in its corresponding module, which will allow both modules to work together once again.
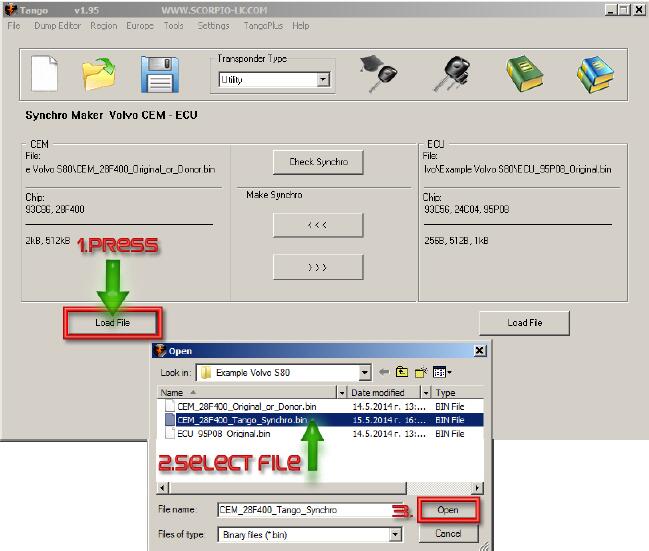
After the new file is generated it is advised to check the synchronization before applying it to the module. Following the example, Press “Load File” under CEM section within the software and select the newly generated by Tango file, which was created in the step above:
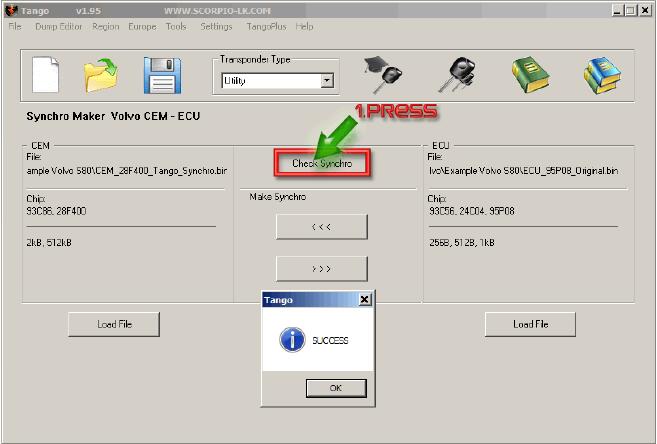
After that press Check Synchro:
After this step just write back the new file in the corresponding module.

Leave a Reply