
MST 90+ Auto Voltage Stabilizer for ECU Programmer User Manual
The black line is connected to the negative pole
The red line is connected to the positive pole
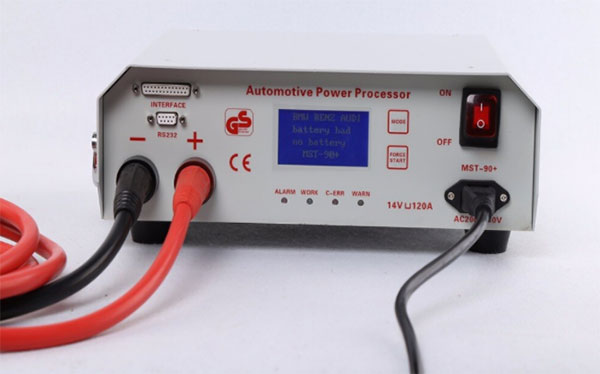
Connect the charger power supply input line and battery charging line,
Turn on the power supply
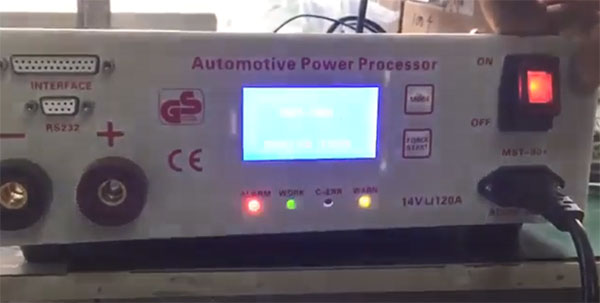
The four indicator lights (ALARM, WORK, C-ERR, WARN) under the MST 90+ will flash at the same time once then go out together.
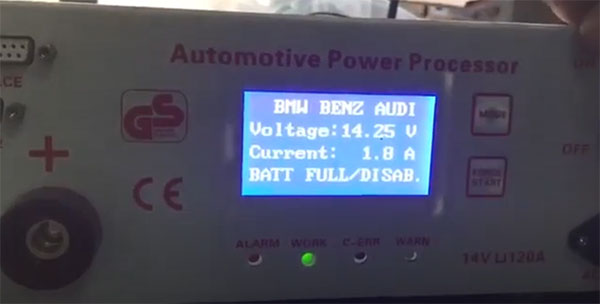
If the MST-90 device does not detect the battery or the connection is incorrect, it means there is no voltage output.
For this situation, you should connect it to the battery (or press the FORCE START button).
When the [WORK] indicator light is on, it means the MST 90+ works normally.
how to use MST 90+ Auto Voltage Stabilizer 3
Turn off the power at the same time, the ALARM and WARN indicator light will be on with the sound di di di.
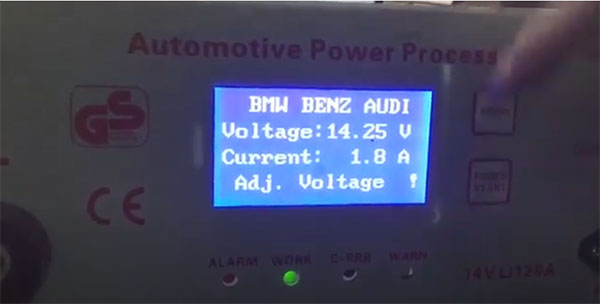
The output voltage is adjusted by the long press [MODE] button for 3 seconds.
Press the [FORCE START] button to increase the voltage
Press the [MODE] button to reduce the voltage
When the adjustment is completed, press the [MODE] button for 3 seconds, and it will exit the voltage regulation.
Using tips:
1. Please use 10A or above of the power supply socket connected to the MST 90+ equipment. Please abide by the general rules of the safe use of electricity. A power supply socket with a ground wire must be used.
2.Verify that the connection between the positive and negative poles is correct when connecting the clip cable to the battery or vehicle.
3. After charging the wire into the connector, please tighten the right and ensure that the connection is reliable and then turn on the power switch.
4. The machine has high pressure, non professionals do not operate, so as not to shock.
5.This charger is only suitable for 12V lead-acid battery charging.
Leave a Reply