SDconnect C4 has one problem:
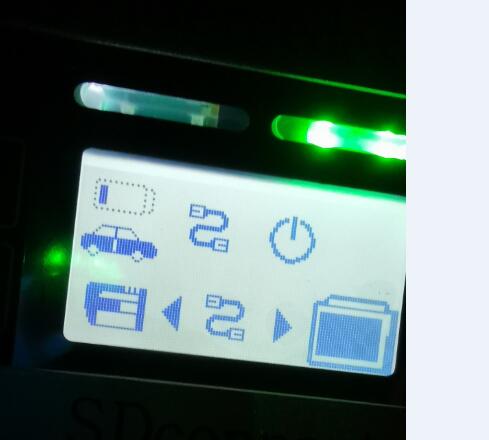
After connecting the network cable, toolkit is connected, but DAS doesn’t work. If I disconnect the OBD cable, C4 will turn off. If I connect the OBD cable, C4 will turn on and the screen displays shown as below, but the network fails to connect.
obd2tool.com engineer solution:
To connect sdconnect c4 to one computer to upgrade C4 hardware.
sdconnect c4 hardware update procedure:
Instructions for the SDconnect Software Update:
with DVD 07/2011
Star Diagnosis variant:
compact4 with SDconnect
compact3 w with SDconnect
Operating system:
Windows XP
Network:
LAN (wired connection)
WLAN (wireless connection)
Objective:
This document provides simple step-by-step instructions for updating the kernel software (operating system) on
your Star Diagnosis SDconnect multiplexer.
The kernel update of the SDconnect is similar to a regular software update via the Star Diagnosis system.
Step 1 Introduction
Step 2 Connecting the SDconnect to the Star Diagnosis system.
Step 3 SDnetControl
Step 4 Software update
Step 5 Completing the installation
Step 6 Checking the installed software
Step 1 Introduction
Check battery if needed (only if related message is shown in the display)
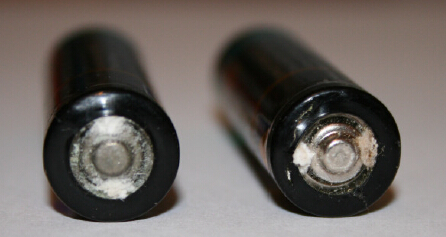
When working on the vehicle or using an external power supply, the message “! Batteries cannot be charged!” may sometimes appear on the SDconnect display:
This may be related to tarnishing, crystal formation, or corrosion on the battery contacts or leaking batteries:
Since the external power supply is extremely important for the update process, the batteries should be checked for the above-mentioned indications by removing the side panel on the SDconnect
If the batteries are contaminated, you can do the following:
– Clean or polish the battery contacts and re-check the battery function.
– Exchange the batteries if necessary (see SDconnect manual, chapter 2.3.2, for notes on batteries)
After checking the batteries, you can continue with the next step.
Closing the Xentry Diagnostics/Xentry DAS diagnostics application
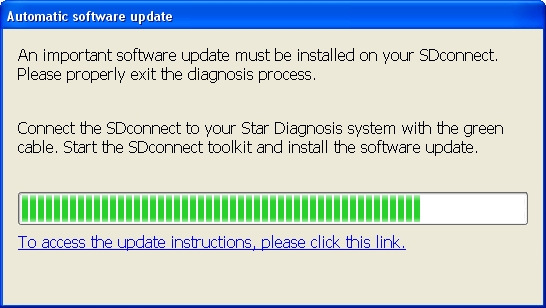
When accessing a vehicle in Xentry Diagnostics or Xentry DAS, the following message appears:
Please exit the diagnostic application Xentry Diagnostics or Xentry DAS correctly and follow the next steps.
Step 2 Connecting the SDconnect to the Star Diagnosis system
Connect the SDconnect to the Star Diagnosis system with the green cable.
The SDconnect will be automatically selected and appear in the deskband on the Star Diagnosis system:
Step 3 SDnetControl
Start SDnetControl by clicking the deskband
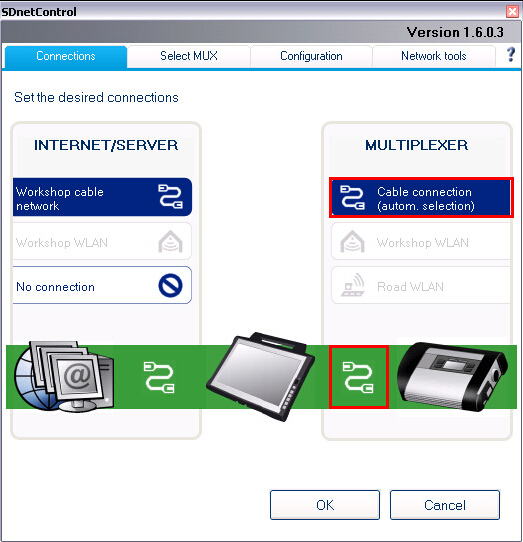
Go to the “Connections” tab.
2) Check whether automatic selection via the cable connection is active:
Go to the “Configuration” tab, and confirm the warning with “Yes”:
Step 4 Software update
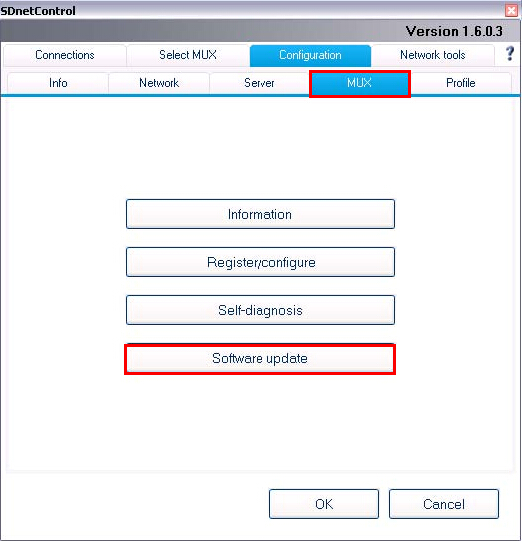
Go to the “MUX” tab in SDnetControl.
Click on the “Software update” button.
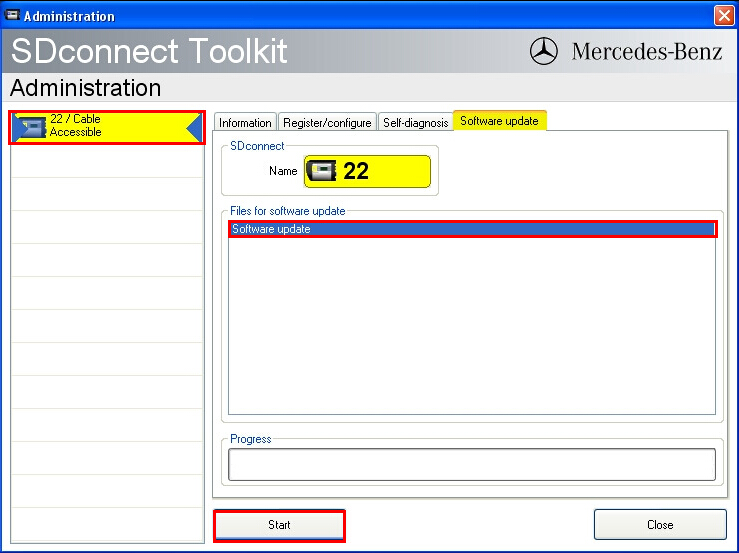
The “SDconnect Toolkit Administration” program will start.
Go to the “Software update” tab in the SDconnect Toolkit.
Your SDconnect is already selected on the left-hand side.
Select the “Software update” packet under “Files for software update”.
Click “Start” to start the process.
The update process will start. This takes approx. 4 minutes.
Step 5 Completing the installation
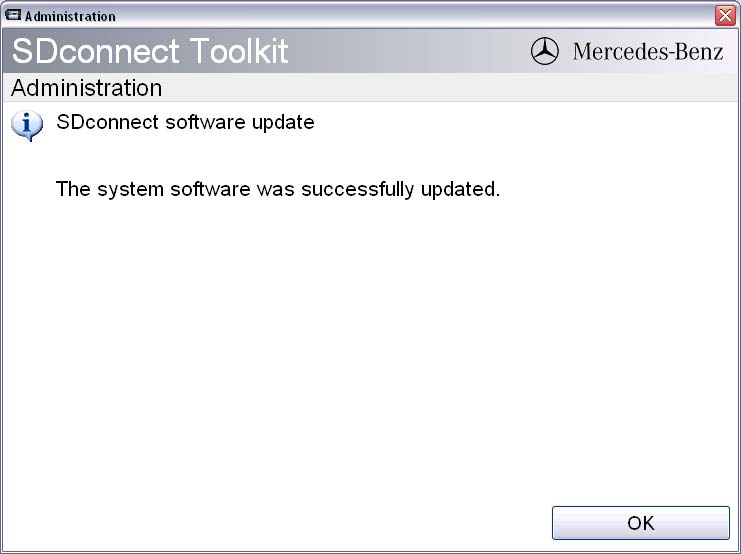
Confirm the successful completion of the update.
After a successful update, a message indicating the successful update completion appears.
Confirm the message by clicking “OK”.
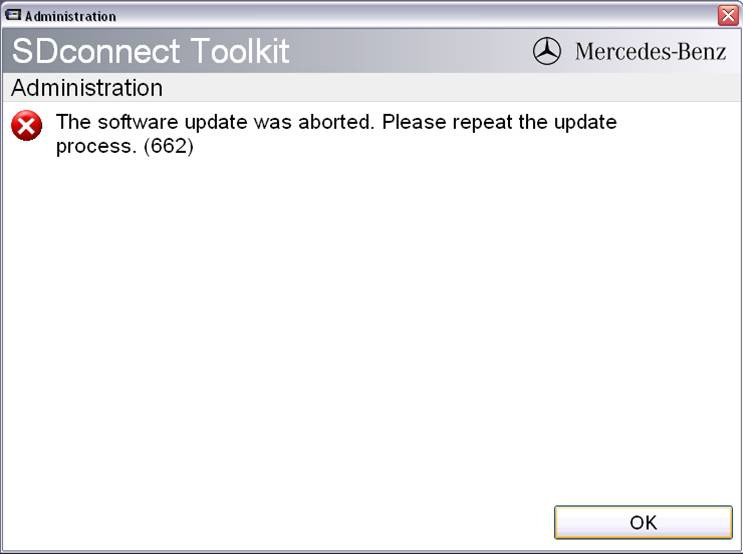
Update not successful
If the update was not successful, the message “The software update was aborted. Please repeat theupdate process” will appear.
Confirm this message by clicking “OK”. Check the SDconnect batteries if necessary and repeat the update process.
Step 6 Checking the installed software
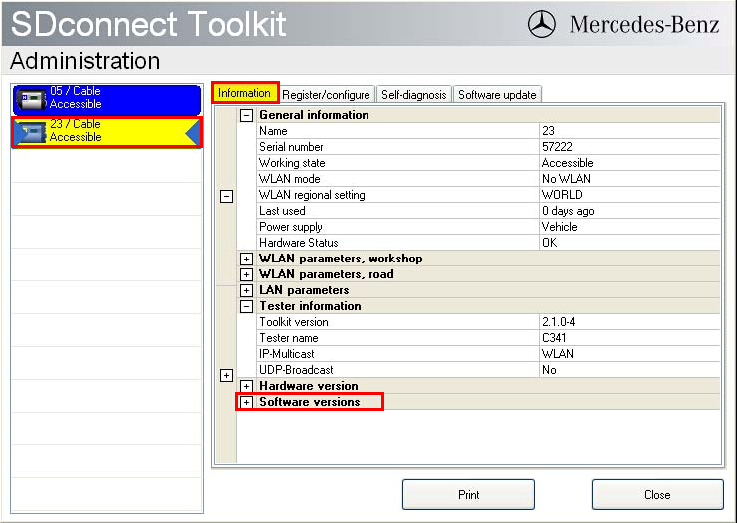
Go to the “Information” tab in SDconnect Toolkit
Select your SDconnect on the left-hand side.
Check the information under “Software versions” at the right:
The versions of the Linux OS and the CommandServer must be at least 2:0:xxxxxx.
The SDconnect software update is complete. The green cable can be removed.


Leave a Reply